
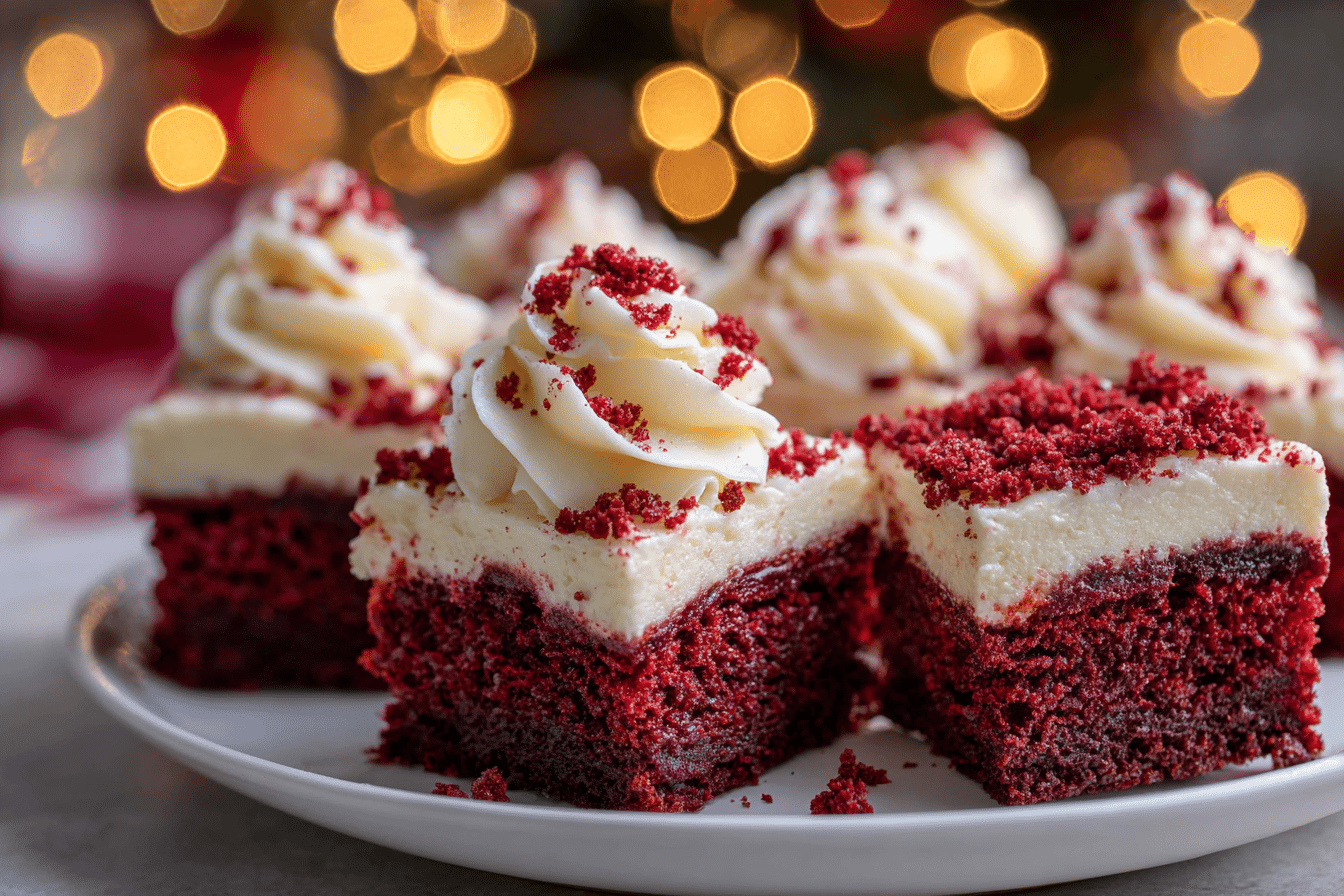
Red Velvet Cheesecake Bites are the ultimate mini dessert — rich, tangy, and decadent with a chocolatey red velvet base and creamy cheesecake center. These two-bite treats combine the best of two classic desserts into one unforgettable indulgence.
Perfect for parties, holidays like Christmas and Valentine’s Day, or anytime you need a small but stunning sweet, they’re as beautiful as they are delicious. The vibrant red color, soft texture, and creamy tang of the filling make them impossible to resist.
These bites are baked in mini muffin pans or shaped into truffles, depending on your style — and they can be topped with whipped cream, dipped in chocolate, or served just as they are.
Ingredients Overview
Here’s a breakdown of the essential ingredients and how they work together to create these irresistible treats.
Red Velvet Base
-
All-Purpose Flour: The structure for your cake base — sifted for tenderness.
-
Unsweetened Cocoa Powder: Just a touch for that signature red velvet flavor.
-
Baking Soda & Vinegar: React to give a subtle rise and moist crumb.
-
Butter: Softened, for a rich texture and flavor.
-
Sugar: Granulated for sweetness and structure.
-
Egg: Binds the batter and helps create that soft, cakey bite.
-
Buttermilk: Adds tang and tenderness — a key ingredient in any red velvet dessert.
-
Red Food Coloring: Classic red velvet hue — use gel for a more vibrant color.
-
Vanilla Extract: Adds depth to both the red velvet and cheesecake layers.
Cheesecake Filling
-
Cream Cheese: Full-fat and softened for a creamy, smooth texture.
-
Powdered Sugar: Blends easily into the cream cheese without graininess.
-
Vanilla Extract: Rounds out the flavor and complements the red velvet.
Optional Garnishes
-
White Chocolate Drizzle: For extra sweetness and contrast.
-
Crumbled Red Velvet Cake or Cookies: Sprinkled on top for texture.
-
Whipped Cream or Cream Cheese Frosting: If serving as open mini cheesecakes.
Step-by-Step Instructions
This version uses a mini muffin pan to create bite-sized baked cheesecake treats.
1. Preheat & Prep
Preheat oven to 325°F (160°C). Line a mini muffin pan with paper liners or lightly grease each cavity.
2. Make the Cheesecake Filling
In a bowl, beat until smooth:
-
8 oz cream cheese (softened)
-
¼ cup powdered sugar
-
½ tsp vanilla extract
Beat until fluffy and set aside in the fridge to firm slightly while you prepare the batter.
3. Make the Red Velvet Batter
In a mixing bowl, cream together:
-
½ cup (1 stick) unsalted butter, softened
-
¾ cup granulated sugar
Beat until light and fluffy. Add:
-
1 large egg
-
1 tsp vanilla extract
-
1 tbsp red food coloring (or gel)
Mix until fully combined.
In a separate bowl, whisk together:
-
1¼ cups all-purpose flour
-
1 tbsp unsweetened cocoa powder
-
½ tsp baking soda
-
¼ tsp salt
Slowly add the dry ingredients to the wet mixture, alternating with:
-
½ cup buttermilk
-
½ tsp vinegar
Mix until just combined — do not overmix.
4. Assemble the Cheesecake Bites
Scoop 1 tablespoon of red velvet batter into each mini muffin cavity. Flatten slightly.
Add 1 heaping teaspoon of cheesecake mixture on top of each, gently pressing into the batter.
Optional: Swirl slightly with a toothpick or leave as distinct layers.
5. Bake
Bake for 13–15 minutes, or until the cheesecake is set and the red velvet base springs back when lightly touched.
Let cool in the pan for 10 minutes, then transfer to a wire rack to cool completely. Chill in the fridge for at least 1 hour before serving for best texture.
6. Finish & Serve
Dust with powdered sugar, drizzle with melted white chocolate, or top with mini frosting dollops. Serve cold or at room temperature.
Tips, Variations & Substitutions
Pro Tips
-
Use Gel Food Coloring: More vibrant red and less liquid than liquid dye.
-
Chill the Cheesecake Mix: Makes it easier to scoop neatly into the batter.
-
Don’t Overbake: The cheesecake layer should be just set, not browned.
Variations
-
Truffle Style: Bake red velvet cake separately, crumble it, mix with the cheesecake filling, and roll into balls. Dip in chocolate.
-
Chocolate Base: Add extra cocoa for a richer chocolate-red velvet hybrid.
-
Filled Only: Make the base from crushed red velvet cookies and press into a mini cheesecake mold instead of using cake batter.
Substitutions
-
No Buttermilk? Use milk + 1 tsp vinegar or lemon juice.
-
Gluten-Free? Use a gluten-free 1:1 baking flour blend.
-
Dairy-Free? Use dairy-free butter, plant-based cream cheese, and almond milk + vinegar.
Serving Ideas & Occasions
Red Velvet Cheesecake Bites are eye-catching and easy to serve — ideal for:
-
Valentine’s Day or Christmas
-
Weddings, showers, or birthdays
-
Holiday dessert platters
-
Edible gifts or party favors
Serve them on a tiered dessert tray, tucked into mini cupcake liners, or chilled on a platter with berries and whipped cream.
Pair with:
-
Espresso or cappuccino
-
Sparkling rosé
-
Fresh strawberries or raspberries
Nutritional & Health Notes
These cheesecake bites are indulgent — rich in fat and sugar, but portion-controlled.
Each mini bite contains:
-
~120–150 calories
-
Protein and calcium from cream cheese
-
Antioxidants from cocoa (even in small amounts!)
To lighten:
-
Use reduced-fat cream cheese
-
Reduce sugar slightly
-
Skip toppings or frosting for a cleaner finish
They also freeze well for portion-controlled treats.
FAQs
Q1: Can I make these ahead?
A1: Yes! Store covered in the fridge for up to 5 days. The flavor and texture improve after chilling.
Q2: Can I freeze them?
A2: Absolutely. Freeze in a single layer, then transfer to a bag or container. Thaw in the fridge overnight before serving.
Q3: What if I don’t have a mini muffin pan?
A3: Use a regular muffin tin and increase baking time by 3–5 minutes. You’ll get 12 standard bites instead of 24 mini ones.
Q4: Can I make them without food coloring?
A4: Yes — they’ll still taste delicious but won’t have the signature red hue. Try natural beet powder if you want a more natural color.
Q5: What kind of cocoa should I use?
A5: Use unsweetened natural cocoa powder. Dutch-processed will work but may result in a slightly darker, less acidic flavor.
Q6: Do I need to use eggs?
A6: Yes, the egg helps bind the red velvet cake. If you need an egg-free version, try using a flax egg or a baking egg replacer.
Q7: Can I swirl the cheesecake layer?
A7: Absolutely. Use a toothpick to swirl the cheesecake into the red velvet batter for a marbled effect — just don’t overmix or it won’t bake cleanly.
PrintRed Velvet Cheesecake Bites – Rich, Creamy & Perfectly Portable
Two-bite red velvet cheesecake treats with a soft cake base and creamy, tangy filling. Perfect for holidays, parties, or make-ahead desserts.
Ingredients
Red Velvet Batter:
-
½ cup unsalted butter, softened
-
¾ cup granulated sugar
-
1 large egg
-
1 tsp vanilla extract
-
1 tbsp red food coloring (or gel)
-
1¼ cups all-purpose flour
-
1 tbsp cocoa powder
-
½ tsp baking soda
-
¼ tsp salt
-
½ cup buttermilk
-
½ tsp vinegar
Cheesecake Filling:
-
8 oz cream cheese, softened
-
¼ cup powdered sugar
-
½ tsp vanilla extract
Instructions
-
Preheat oven to 325°F. Line or grease a mini muffin tin.
-
Beat cream cheese, powdered sugar, and vanilla until smooth. Chill.
-
Cream butter and sugar. Add egg, vanilla, and red coloring.
-
Whisk dry ingredients. Alternate adding dry mix and buttermilk to wet ingredients. Add vinegar last.
-
Scoop red velvet batter into muffin cups. Add a spoonful of cheesecake mix on top.
-
Bake 13–15 minutes until set. Cool completely, then chill at least 1 hour.
-
Dust with cocoa or drizzle with white chocolate before serving.
Notes
-
Store refrigerated for up to 5 days
-
Freeze for up to 1 month
-
Add swirls or toppings for variation